Inviting participants and permissions
Guide:
To add participants and change permissions, you need to be an administrator of the binder.
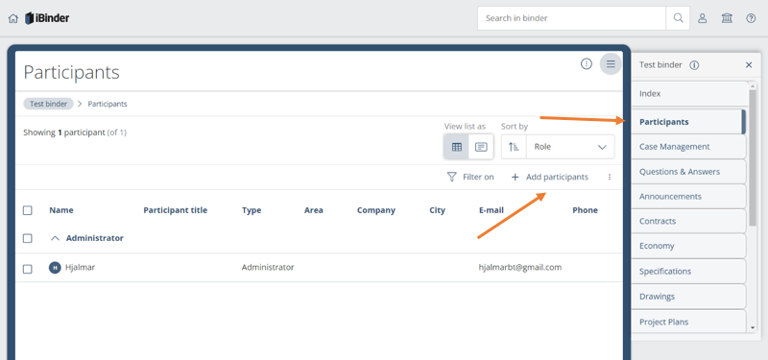
Go to the "Participants" tab and click on "+ Add participant":
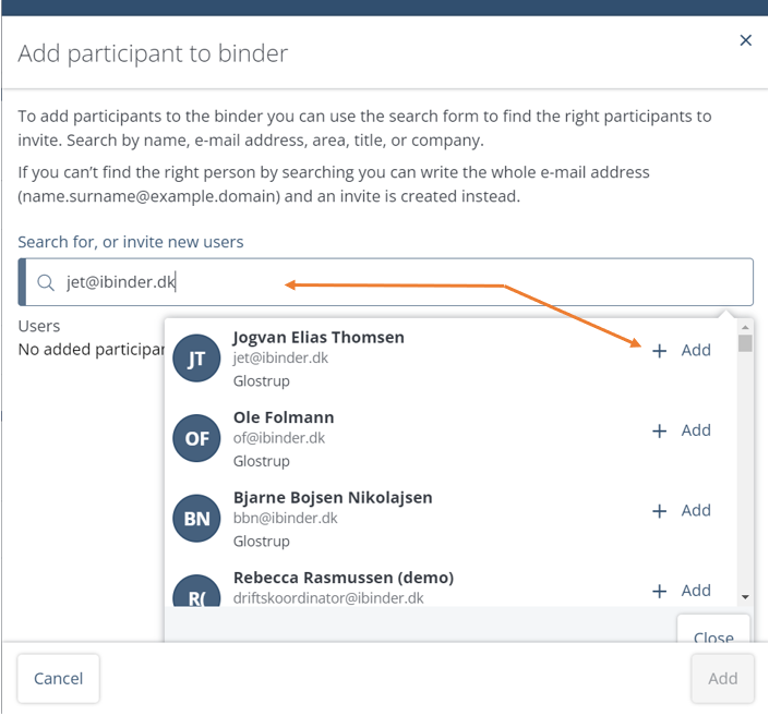
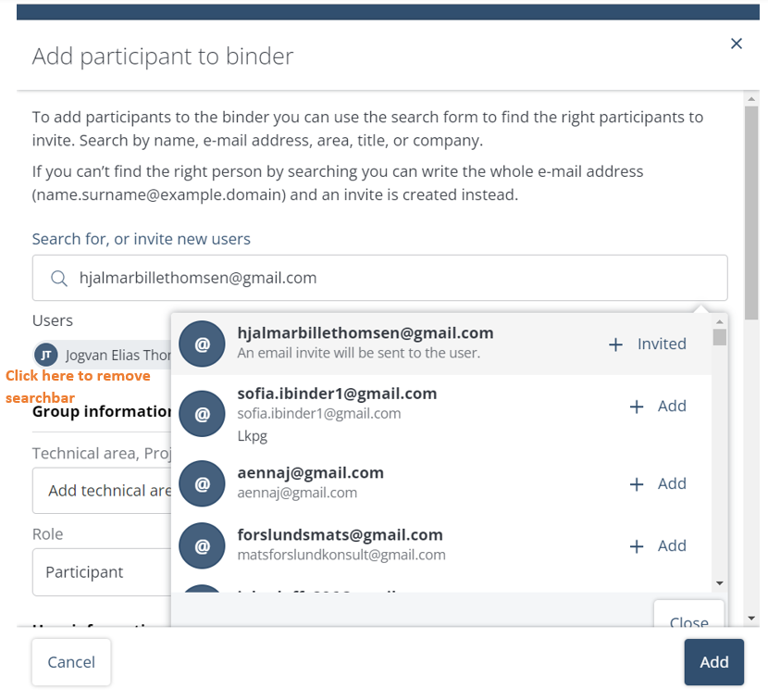
Search among existing users in iBinder: Search for the participant you want to invite, you can search by name, city, company or email. If the system can find the user, simply click "Add" next to the person's name.
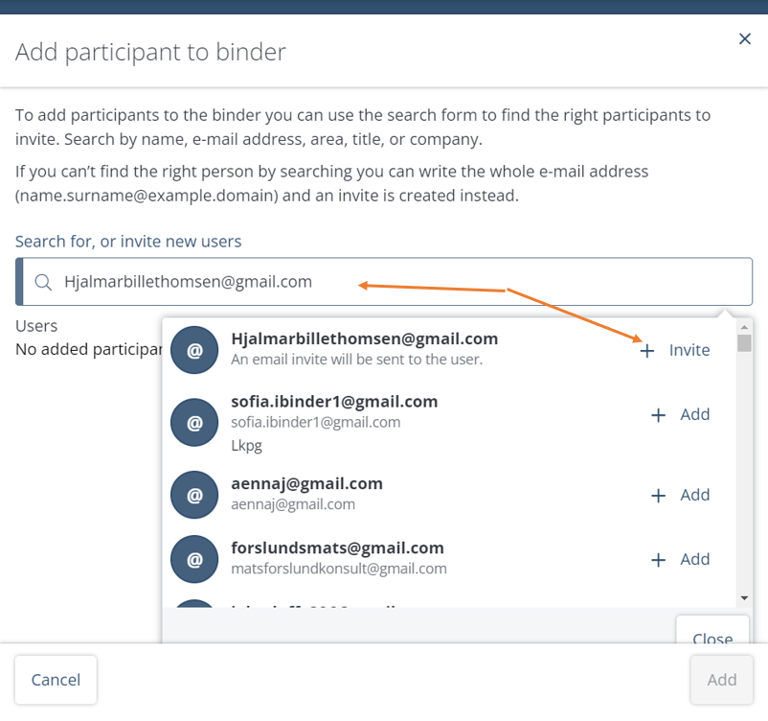
How to add a non-existing user:
If the person doesn't have an existing user in iBinder, you can fill in the person's email and then click on "invite new user". This will automatically create a user for the person.
Then click below or next to the search window to hide it:
Now it's time to give permission to the participant:
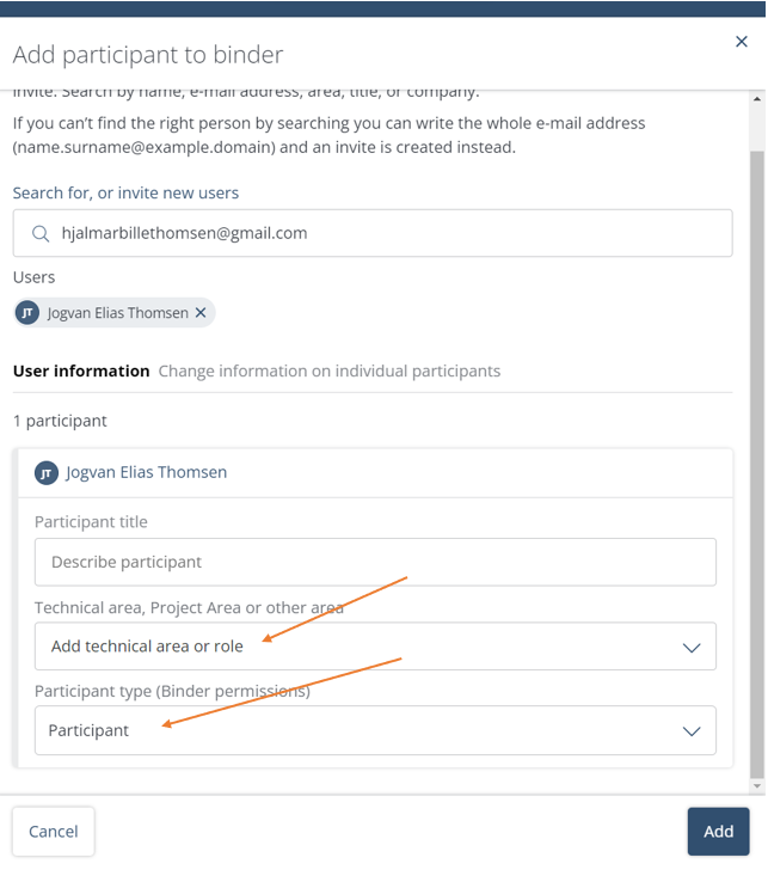
Add field of expertise or role. Here you select the participant's technical area. For example, if you are inviting an architect, you can choose "Architecture". If you are inviting a project manager, you can choose "Project Manager", and so on.
Roles:
Administrator - Full permission, can also see secret/hidden tabs.
Participant - Standard permission, can upload documents.
Guest - Can only view/read documents in the folder.
Once you have selected the appropriate role for the participant, simply click "Add".
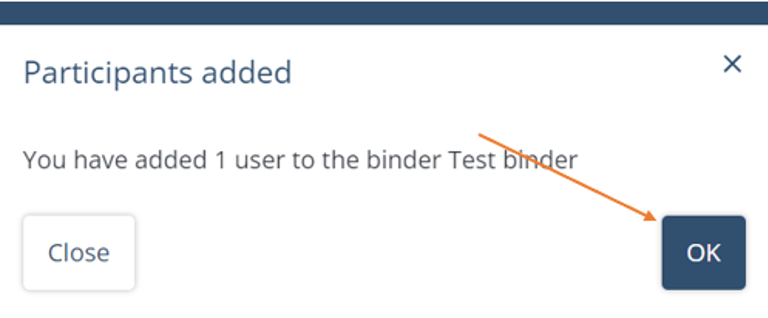
Now you will receive a confirmation that the invitation has been made. The participant will automatically receive a notification to their email.
