Checklists
To start using a checklist, you first need to ensure that you have a tab type that is customised for checklists. To create such a tab, you can read the section on how to edit tabs and select the "Checklist" tab type.
Empty checklists can be created or completed tasks can be uploaded in the checklist tab.
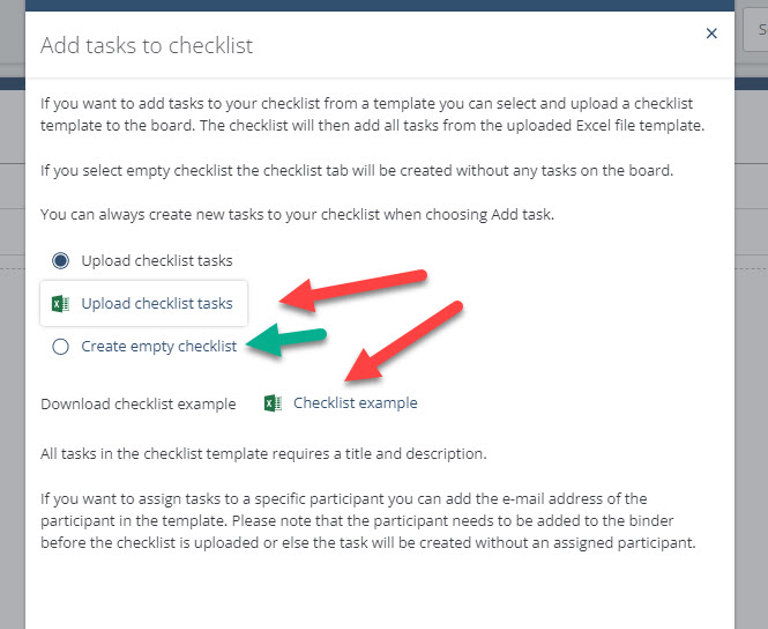
Start by clicking on "Add tasks to checklist".
If you already have a checklist of completed tasks, you can easily download our sample excel file and then edit it to suit your needs. Then click "Checklist example" (red arrows below). In this excel file, you can then enter each task's title (required), description (required), category and person responsible.
If you don't want to do this and instead want to enter your tasks directly into the system, you can start from an empty checklist (green arrow below).

If you want to start with an empty checklist, click "Create empty checklist" and save. After this, you can then click on the create new task button to add tasks to your checklist.

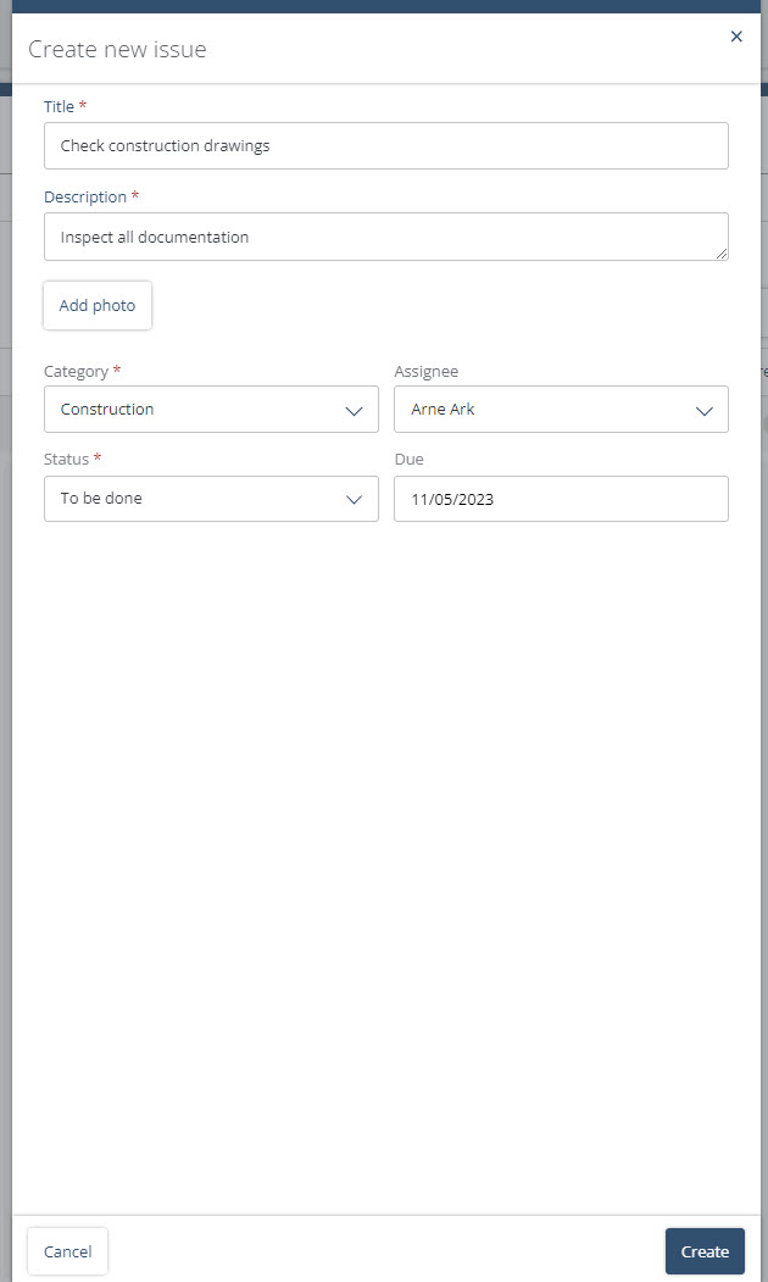
Enter a task title and description. It is also possible to add an image. This can be a good feature to use if you are on a construction site and have to attach an image directly from your mobile phone. Then select the category (you can create new categories directly in the menu), status, who is responsible for the task and the due date.
If you cannot save your task, it may be because you have not filled in all the required fields. Please note that the fields with a red asterisk are required.

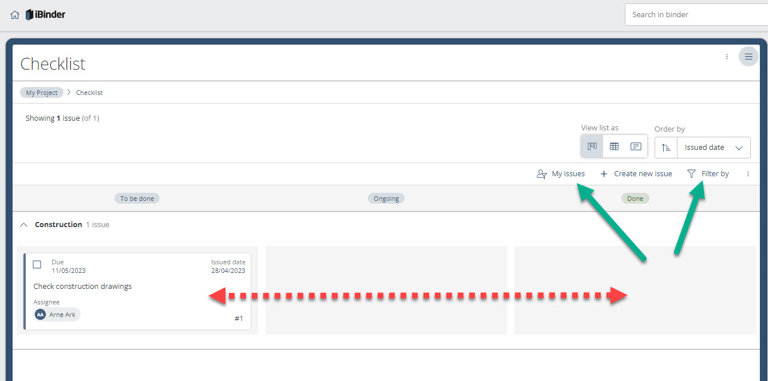
The task is now created. It is easy to sort the checklist view with different filters (green arrows).
Note also that you can drag and drop the cards between different statuses directly from the checklist view (red arrows).

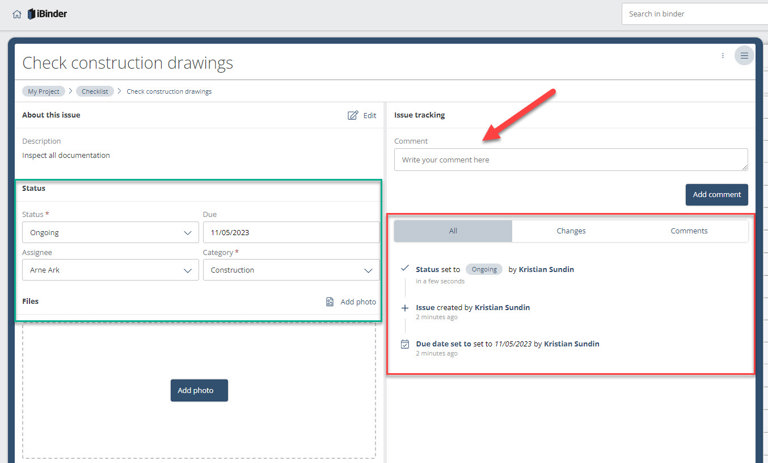
If you want more information about a task or wish to edit content, you can click on the card.
It is possible to enter comments for a task directly on the card (see red arrow below).
On the left (see green highlighted field), status, person responsible (assigned), due date, category can be changed and more images can also be added.
On the right, a log of all events for a task (see red highlighted field) is displayed, such as different comments made and who changed the status and when.

