Inspections
What are inspections?
The inspection function in iBinder is a valuable tool to help property managers keep track of all inspections related to the property, such as regulatory inspections. The function is mainly used in the management binder.
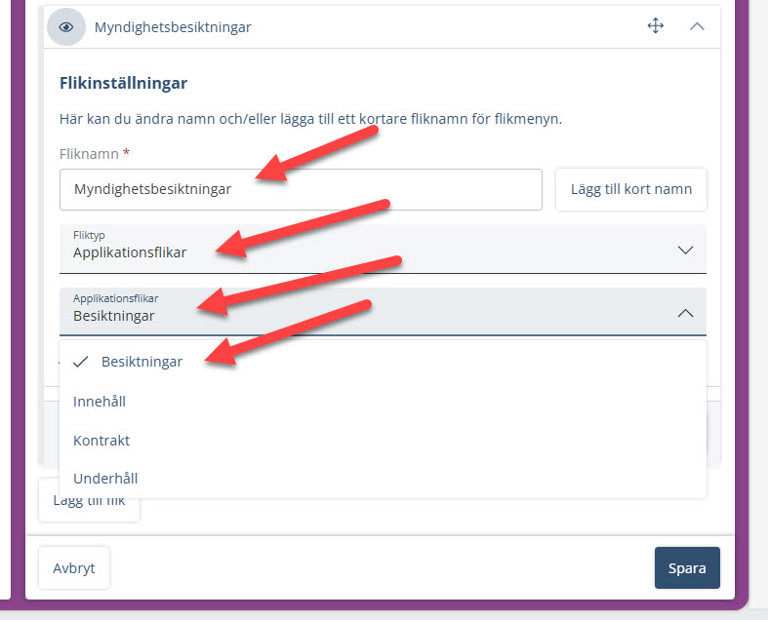
If this tab type is not included in the binder, it may need to be created first. In that case, follow the guide here on how to add new tabs, and select the tab type "Application Tabs", then "Inspections".
Overview of the Property’s Inspections
When opening the inspection tab, you get an overview of all registered inspections for the property. The view can be customized in several ways:
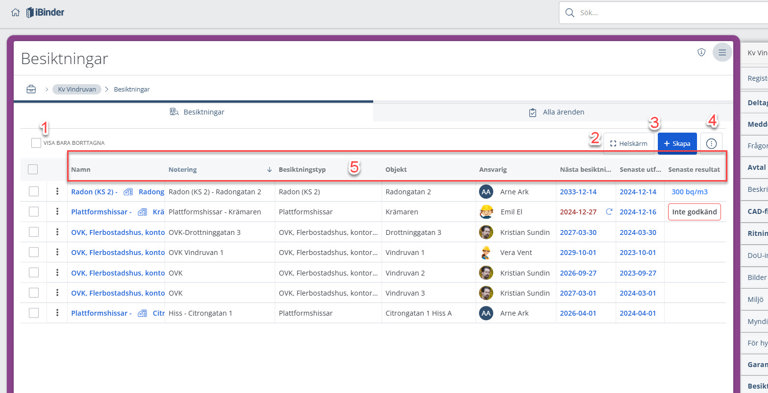
- 1. Show only deleted - Check the box to display deleted inspection plans.
2. Full size - Click to utilize the full screen size. Press "Esc" to return to the standard view.
3. + Create - Click here to create a new inspection plan. - 4. More options - Click here for additional options, such as exporting to CSV or Excel.
- 5. Columns - everal customizations can be made here:
- - Each column can be adjusted in width by dragging the edge.
- - Click and hold the left mouse button to drag and drop columns next to each other to change the order..
- - Click the "funnel" icon to the right of the column name to apply filters..
- - Klicka på sorteringspilen för att ändra sorteringsordningen på kolumnens celler.
- - Click the sorting arrow to change the sorting order of the column cells.
In the organization binder, it is also possible to get an overview of all property inspections in one place under the "Inspections" tab.
Create a New Inspection Plan
Click "+ Create" to start a new inspection plan. Fill in the required values as described below:
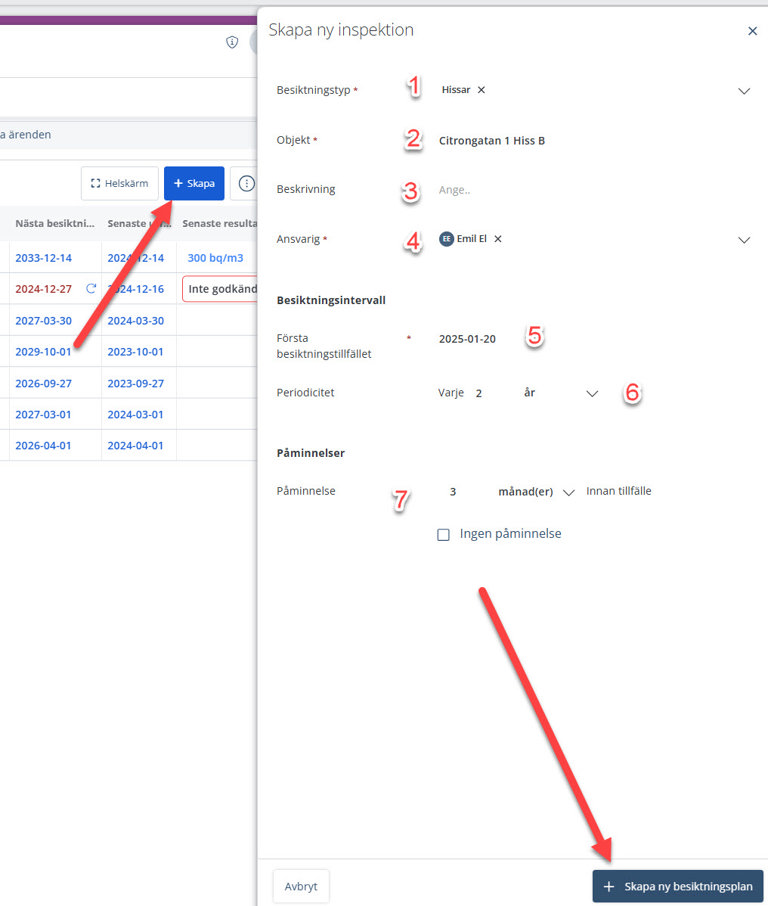
1. Inspection Type
Select the inspection type based on the organization's available inspection types.
2. Object
Choose the object to which the inspection plan belongs.
3. Description
Enter a description (optional).
4. Responsible Person
Assign a responsible person. The person creating the inspection is set as the default.
5. First Inspection Date
Select when the first inspection should take place (or has taken place).
6. Periodicity
Depending on the inspection type, a periodicity will be available. The interval of the periodicity can be adjusted.
7. Reminder
Choose when and if a reminder should be sent to the responsible person.
Click "+ Create new inspection plan" to proceed.
After this, you will be directed to a view displaying information about the inspection plan and all scheduled inspection events.
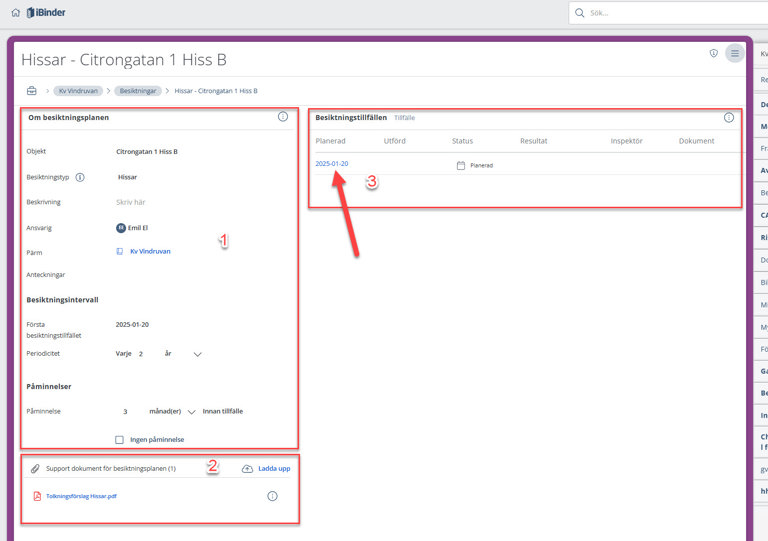
1. Information
Here you can view all details about the inspection plan. The information can be edited.
2. Documents
This section displays documents related to the inspection plan, such as interpretation proposals from iBinder or instructions on how the inspection should be carried out. You can also upload your own documents/drawings related to the entire plan using the "Upload" button.
3. Inspection Events
Here you get an overview of all inspection events, both completed and planned. Click on a date to open the inspection event.
Register an Inspection Event
Open an inspection event by clicking on the date as indicated by the arrow in the image above.
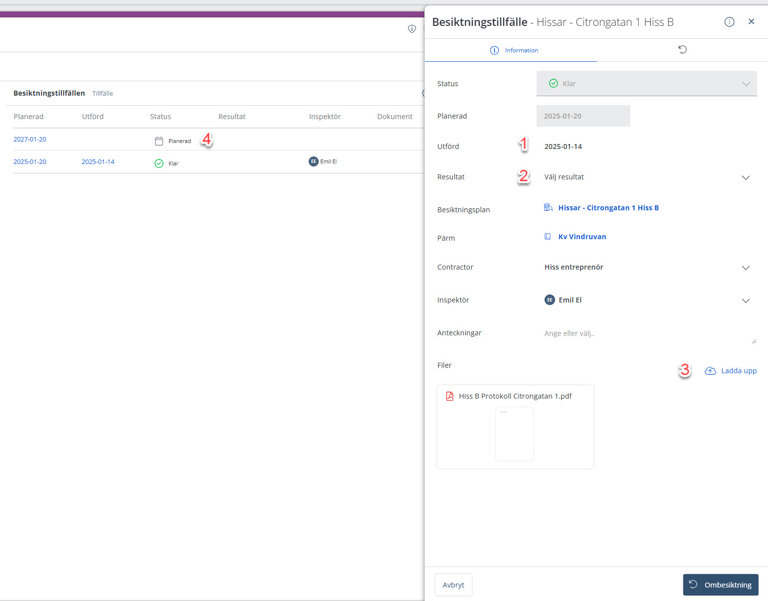
1. Completed
Enter the date when the inspection was performed.
2. Result
Specify whether the inspection was approved or not. If the inspection type includes a measurable value, such as a radon measurement, enter the recorded value.
3. Upload
Here you can upload the protocol/report along with related documentation using the button or by drag and drop.
4. Planned Event
A new inspection event with the status "Planned" is automatically created according to the specified interval with a preliminary date.
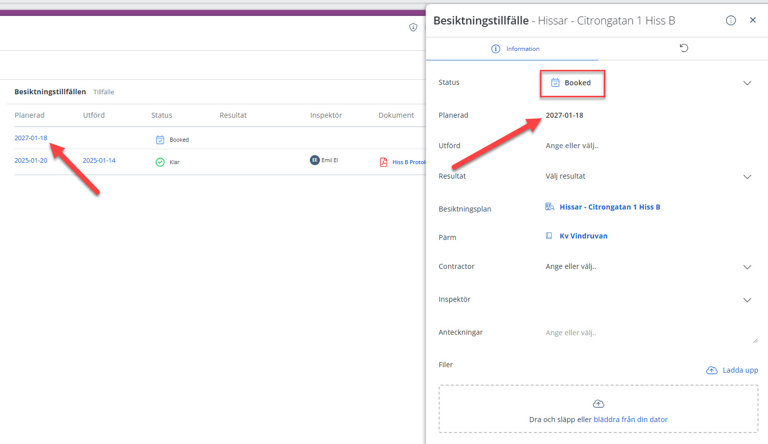
When a new inspection is scheduled, you can click on the planned inspection event and select the new date. The status will then change to "Booked".
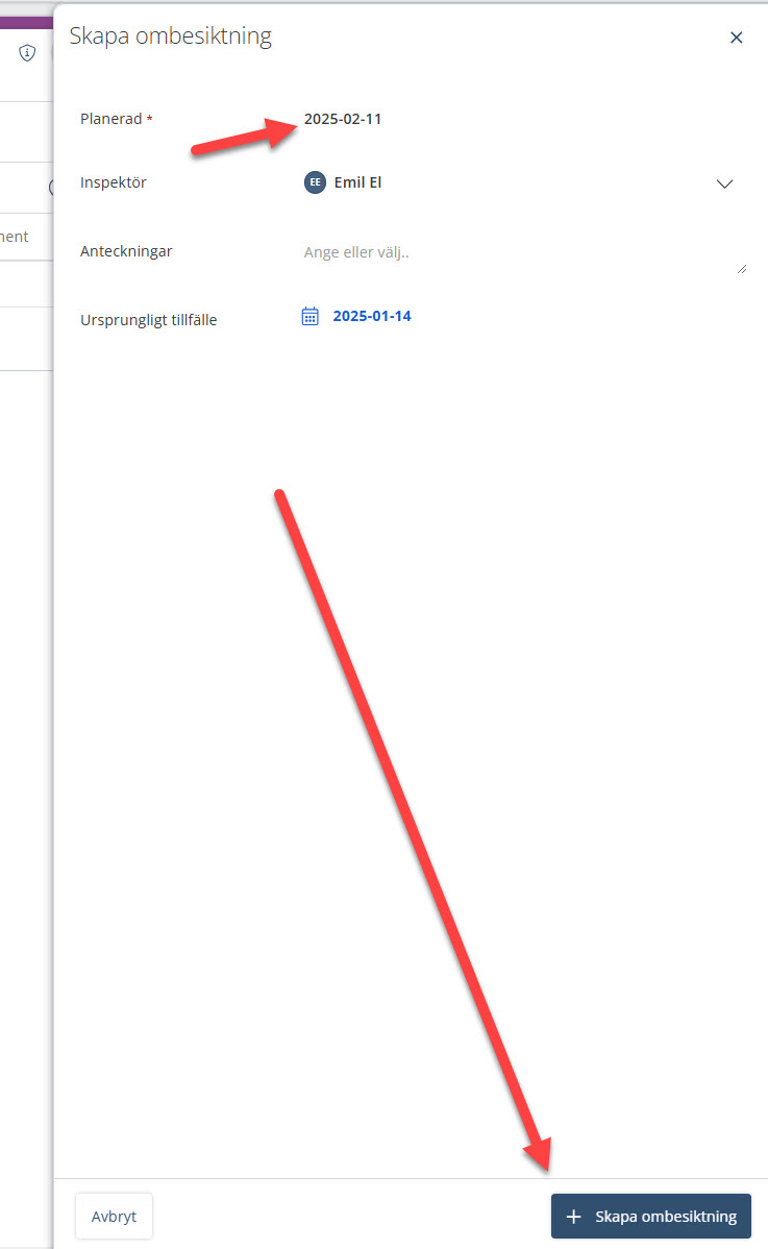
Register a Re-Inspection
If an inspection event has been completed but requires additional actions for any reason, you can easily register a re-inspection by clicking the re-inspection button, which becomes active after the original inspection event has been completed.
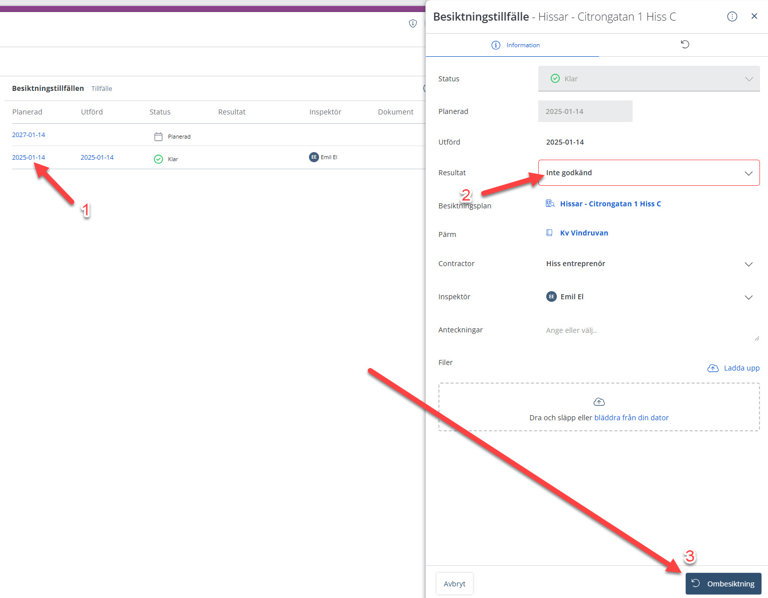
Open the Inspection Event and Register a Re-Inspection
Open the inspection event and select a result if desired, e.g., "Not Approved".
Click the "Re-Inspection" button to create a follow-up inspection event.